Version-verified guide
Valheim Base Design Ideas — Location, Layout and Raid-Proofing
Where to put your Valheim base, how to lay out a main hub versus an outpost network, and the design choices that survive raids, smoke, stability loss and long hauls.
By Valheim Field Guide Editorial Team

Location matters more than the building
The most common mistake is designing a base before choosing a site. Check these before you place a single piece:
- Biome. Start in the Meadows. It is the safest place to learn the systems, and you can relocate once you have a boat and portals.
- Flat or terraced ground. Building into a slope costs more wood and gives worse stability than a flat pad. Terracing with the pickaxe and stone is worth the time.
- Water access. Every biome after the Black Forest is separated by ocean. A base with a shore and a dock beats an inland fortress for the whole rest of the game. See ocean and sailing.
- Resource loops. You want copper and tin close for the Black Forest stage, iron routes for the Swamp, silver for the Mountains. Do not build your permanent home before you know where the ore is.
- Centre of the map. The Sacrificial Stones sit near the world centre and you will return to them to swap Forsaken Powers. A portal link to that area pays for itself.
Main hub or outpost network?
Outposts, with one hub. Valheim’s map is too big for a single base, and the game rewards a network:
- Hub — everything permanent: full station cluster, big storage, farm, beds, portal to every other site.
- Biome outposts — a roofed shed with a Workbench, a bed, a chest and a fire. Enough to get the Rested bonus, repair gear, smelt a load of ore and sleep through the night. Ten minutes to build, saves hours.
- Portals — the connective tissue. Build a portal pair at the hub and at every outpost and you stop walking across the map with full pockets.
The one thing you cannot outpost is your crafting station levels: upgrade pieces only count near their own station, so keep the serious Forge and Galdr Table setup at the hub. Which pieces raise which station: workstations guide.
Layout of a working hub
Put function first, looks second — the shape follows:
- Station cluster under one roof. Workbench, Forge, Cauldron, plus smelter and charcoal kiln vented to the outside. Chests within reach of all three; crafting pulls from nearby chests automatically.
- Sleeping and comfort area. Bed, fire, banners and furniture. Comfort raises your Rested bonus, which is the biggest stamina regeneration boost in the game.
- Storage room. Sort chests by material family and label them. You will thank yourself in the Mistlands when a single trip hauls four ore types.
- Farm and animal pens outside but fenced. Crops need cultivated soil and water nearby; pens keep your tamed animals from wandering into a raid.
- Dock and boat parking if you have water. Mark the boat on the map every time you land somewhere new.
Surviving raids
Raids are triggered events that spawn enemies at your base. Design for them instead of reacting:
- Walls and gates around the core, with the station cluster inside. Enemies that reach your Workbench can destroy it.
- Do not build a wooden maze. Walls with a defensible choke point beat sprawling wooden fences you cannot hold.
- Keep pens and farms inside or well outside. Raiders pathing through your farm destroys crops.
- Stone for anything tall. Wood loses stability as it climbs; stone walls and core wood beams carry far more. See building basics for the stability colour system.
- Tune it instead. If raids are ruining a co-op world, lower the
raidsworld modifier rather than rebuilding: World Modifiers.
Smoke, fire and comfort
- Every indoor fire needs a chimney, vent or hole in the roof. Smoke accumulates in enclosed rooms and damages you.
- A fire indoors grants comfort; a bed under cover sets your spawn and grants Rested.
- Furniture, banners and lighting raise comfort further. It is the cheapest survivability upgrade in the game.
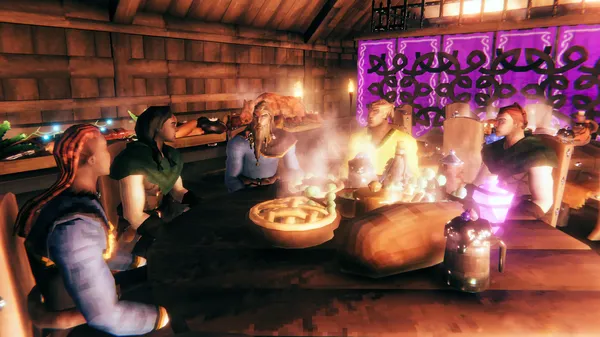
Biome-specific hazards to design around
| Biome | What the base must handle |
|---|---|
| Meadows | Nothing serious — use it to learn |
| Black Forest | Greydwarf raids; roof and walls matter |
| Swamp | Wet and poison; build above water level, keep a fire dry |
| Mountain | Cold; the Wolf cape line and indoor fire are mandatory |
| Plains | Deathsquitos and fuling raids; walls and open sightlines |
| Mistlands | Verticality and mist; a compact, roofed, well-lit outpost beats a big hall |
| Ashlands | Fire and lava; stone construction and fire resistance |
Being verified: Deep North base-building specifics — hazards, materials and whether the biome permits normal construction — are still being cross-checked against the 1.0 release. This page will be updated once confirmed. See our verification workflow.
Ideas worth stealing
- The boathouse hub — build the base around the dock, so every haul ends at the storage room.
- The terraced mountain fort — cut into a slope, stone walls on the outside, core wood inside; natural stability plus a defensible gate.
- The portal ring — a small round room at the hub with one portal per biome on the walls, each labelled.
- The forge courtyard — smelter, kiln and forge in an open-roofed yard, with the Workbench shed adjacent; smoke never accumulates and everything stays in range.
- The one-room outpost — 4×4 floor, roof, bed, Workbench, chest, fire. Build it in every biome before you explore it.
Related
- Stability colours, materials and the pieces every base needs: building basics
- Station levels and upgrade pieces: workstations
- Calculate the materials before you cut: building materials calculator
Related guides
- Valheim Building Basics — Stability, Materials and Layout
How Valheim building works: the stability colour system, wood versus core wood versus stone, and the core pieces every functional base needs.
Verified Valheim 1.0 - Valheim Furniture & Decor Guide — Storage, Stands and Rested Comfort
Everything Valheim furniture does besides look nice: storage capacity tiers, the new 1.0 item and armor display stands, how the Rested comfort bonus actually works, and what the 80+ new 1.0 build pieces add to a base.
Verified Valheim 1.0 - Valheim Portal Network Guide — Build, Tag and Design Your Fast-Travel Hub
Everything about Valheim portals: recipe and unlock, how tag matching works (with the 4-portal pairing rule), the complete teleportation-blocked items list, what the Portal Stone changes, and how to design a usable hub network.
Verified Valheim 1.0